")

Step-by-Step Diagnostics—Venting, Heating Elements & Lint (Canadian Codes)
When a dryer starts taking two, even three cycles to dry a normal load, most people assume the machine is dying. In reality, the usual culprit is air—specifically, air that can’t get out. Restricted venting makes dryers limp along, waste electricity or gas, and run hotter than they should. Less often, the issue is a failed heating element or internal lint buildup around thermostats and sensors. This guide walks you through a practical, step-by-step diagnostic approach tailored for Canadian homes, with notes on National Building Code of Canada (NBCC) considerations and common provincial/municipal practices.
Quick note: Appliance Rescue doesn’t sell repair services. They publish expert guides, appliance tips, and troubleshooting advice you can follow at home. If you need clarification on this article, use their Contact us page.
The Fast Triage: Is It Venting, Heat, or Lint?
Use this quick decision tree before you grab a screwdriver.
- Feel the exterior hood while drying.
- Strong, steady airflow, warm exhaust: Venting may be okay; investigate load size, heating cycle, sensors.
- Weak, pulsing, or hot-but-feeble airflow: Likely vent restriction (kink, long run, lint, stuck damper, crushed flex).
- No warmth at all (but drum turns): Heating failure (element, gas ignition, thermal fuse, high-limit thermostat).
- Warm but cycles too quickly on/off: Poor airflow or a faulty cycling thermostat/moisture sensor.
- Time the first 10 minutes on “Timed Dry, High Heat.”
If the exhaust hood becomes quite hot quickly, yet the airflow is weak, think of blockage. If it never warms, think heat fault. - Check load basics.
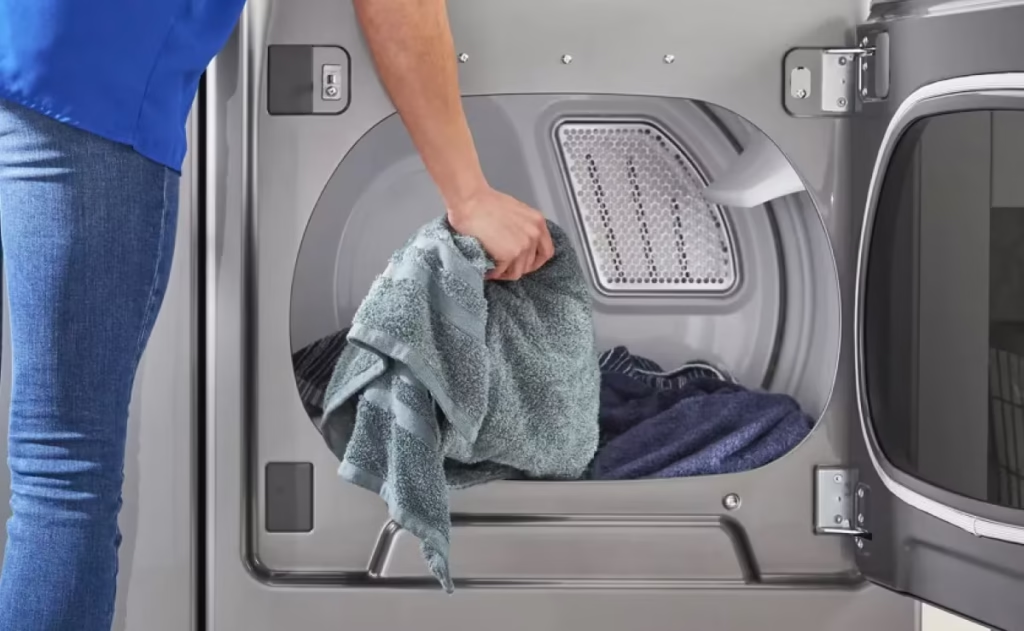
Mixed heavy/light fabrics, overfilled drum, or cold basement intake air in winter can each extend dry times.
Why Venting Rules the Dry Time

Dryers move large volumes of air (often 150–220 CFM). If that air can’t escape, moisture stays in the drum. Electric elements and gas burners then cycle more often but dry less. Chronic restriction also bakes lint onto internal ducts, raises fire risk, and shortens component life.
Canadian Code Nuances (What to Keep in Mind)
While you should always consult your local authority and appliance manual, these widely accepted principles align with NBCC-style practice and common municipal bylaws:
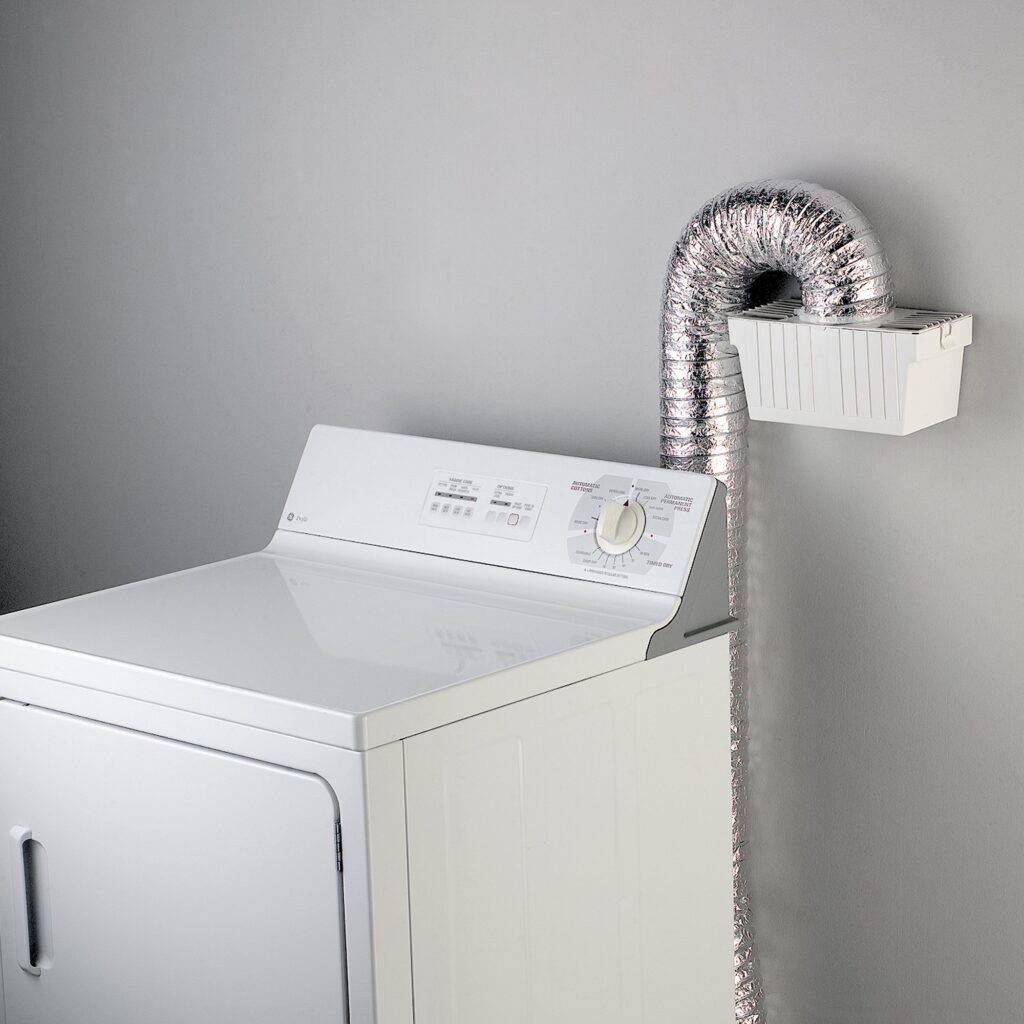
- Dedicated, smooth metal duct to outdoors.
Use rigid metal (galvanized or aluminum). Avoid plastic or vinyl flex—these are typically non-compliant and hazardous. Semi-rigid is acceptable only for the short connector behind the dryer if the manufacturer allows it. - Shortest, straightest route.
Manufacturers specify a maximum equivalent length—often around 7.6 m to 10.7 m (25–35 ft). Each 90° elbow adds roughly 1.5 m (5 ft) or more of “equivalent” length. Check your model’s chart. - No screens at the termination.
Exterior hoods should have a damper flap (or low-profile louver) without insect screens, which trap lint and violate most codes/guidelines. - Terminate outdoors—never into the attic, crawlspace, or garage.
Moist air must leave the building envelope to prevent mold and structural damage. - Backdraft damper & weather hood.
The cap should include a damper that opens freely and closes when off. In cold climates, choose a cap that resists frost binding. - Booster fans:
Allowed only when the manufacturer approves and is installed per code with service access and an interlock (so it runs when the dryer runs). Condos and multi-unit buildings may have restrictions—check your building management and local code. - Gas dryers (NG/propane):
Confirm proper combustion air and venting per the gas code. A partially blocked vent can cause burner cycling and CO hazards. CO alarms are essential. - Condo/apartment risers:
Some buildings share or prohibit certain dryer vent configurations. Watch for common risers that need periodic professional cleaning and specific fire-stopping measures.
Step-By-Step Venting Diagnosis (Do These Before Opening the Dryer)
1) Visual Inspection Inside
- Pull the dryer out carefully. Check for a crushed or kinked connector. Replace flimsy foil flex with semi-rigid (short connector only) or go rigid if space allows. Keep the connector as short and straight as possible.
- Secure with proper clamps, not tape alone. Foil tape may supplement, but mechanical clamps should do the sealing.
2) Exterior Termination Check
- Operate the dryer on High Heat and observe the hood.
- Flap should open fully; louvers should pivot freely.
- Feel for even, strong airflow.
- Look for lint mats or bird nests. If there’s a screen, replace the cap with a screen-less design.
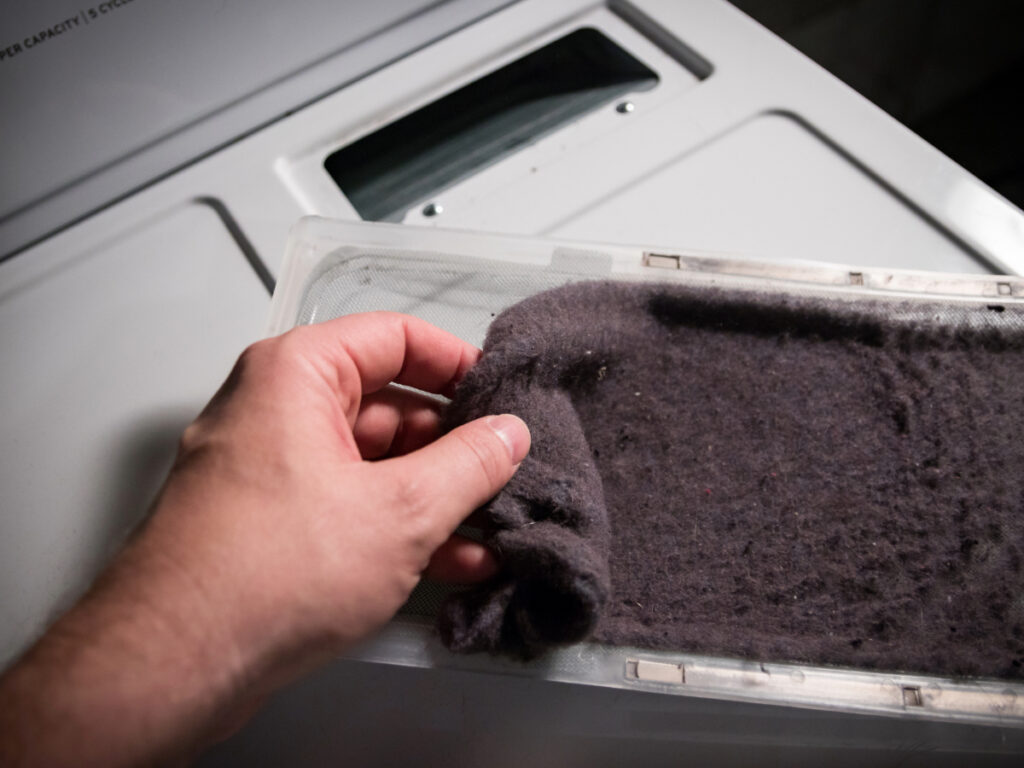
3) Lint Trap & Chute
- Clean the lint screen. Then shine a flashlight into the lint chute; vacuum any visible clumps. A lint-clogged chute starves the blower of air even if the main duct is clear.
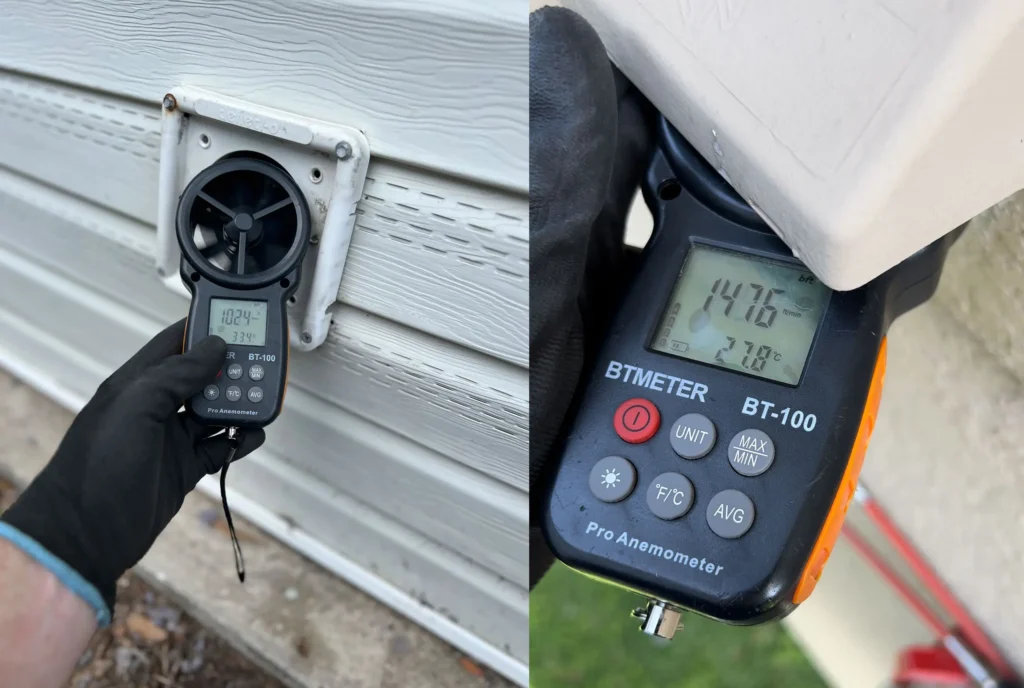
4) Airflow Test (Simple Methods)
- Tissue test: Hold a single ply over the hood; it should be pushed away briskly.
- Anemometer: Consumer meters can measure face velocity. While not lab-grade, they help detect changes before/after cleaning.
- Dry time benchmark: A normal, mixed load should be dry in ~40–60 minutes on High Heat with proper venting.
5) Duct Cleaning
If airflow is weak:
- Detach sections and rod clean from indoors to outdoors with a brush system that won’t puncture metal.
- Vacuum from both ends.
- Rebuild long, tortuous runs if possible. Each elbow removed can be worth minutes saved per cycle.
If you’re unsure about code-compliant duct routing or selecting a proper hood in a cold region, browse the guides at Appliance Rescue or Contact us for clarification. Again, they’ll advise—not dispatch a technician.
When Venting Looks Fine: Heating Element & Sensor Checks

If airflow is strong and the duct is short and clean, shift focus inside the appliance.
Safety First
- Unplug electric dryers; shut off the gas and unplug gas models.
- If you’re not comfortable with electrical testing or gas safety, stop here.
Electric Dryers: Element & High-Limit Protection
- Heating Element:
- Visual breaks or coils touching the housing indicate failure/shorts.
- Check continuity with a multimeter (expect continuity across the element; no continuity means open/faulty).
- Thermal Fuse / High-Limit Thermostat:
- Usually opens if the dryer overheats (often because of venting issues). Once open, many fuses do not reset and must be replaced.
- Cycling Thermostat:
- Regulates drum temperature. If stuck open/closed, cycles will be wrong (either no heat or constant high heat leading to premature high-limit trips).
Gas Dryers: Ignition Sequence
- Watch the burner through the peep port: Glow igniter → gas valve opens → flame appears.
- No glow: igniter or thermal fuse issue.
- Glow but no flame: faulty gas valve coils or supply issue.
- Flame lights then quits quickly: airflow or cycling/hi-limit problem; venting may still be suspect.
Moisture Sensor & Control Logic
- Many dryers reduce heat early if the sensor reads “dry” due to residue on the sensor bars.
- Clean with isopropyl alcohol to remove dryer sheet film.
- Test on Timed Dry to isolate control logic from sensor-based auto cycles.
Canadian Climate Factors That Quietly Extend Dry Time

- Cold intake air: In winter, makeup air is colder and denser; the dryer works harder to raise the air temperature. Good venting becomes even more critical.
- Icy terminations: Flapper caps can frost-bind in sub-zero conditions. Choose low-resistance caps designed for winter and check them mid-season.
- Basement humidity: Damp basements slow evaporation. A dehumidifier near the laundry area can improve performance.
Maintenance Cadence (What “Good” Looks Like)
- Every load: Clean lint screen.
- Monthly: Wipe moisture sensor bars; vacuum behind/under unit.
- Each season (or every 6 months): Inspect exterior hood, confirm free movement.
- Annually (or sooner if dry times creep up): Brush-clean the duct, especially long runs and elbow clusters.
- After renovations or new pets: Expect more debris; increase frequency.
Common Design Pitfalls in Canadian Homes

- Long up-and-out runs in multi-storey houses.
Consider relocating the laundry or rerouting ducts to reduce elbows and equivalent length. Booster fans are a last resort and must be code-compliant. - Shared bath fan and dryer duct (not allowed).
The dryer must have its own dedicated vent. - Termination into soffits or enclosed spaces.
Moisture damage and mold risk aside, this usually conflicts with code expectations. - “Just add a mesh screen to stop critters.”
Don’t. It clogs with lint, choking airflow and creating a fire hazard.
Symptom-to-Cause Cheat Sheet

- Clothes hot but still damp after full cycle: Restricted venting; overdrying setting off; mixed loads; sensor film.
- Clothes barely warm, never dry: Open thermal fuse, failed element (electric), failed igniter/valve coils (gas), or tripped breaker on one leg (electric).
- Dryer runs very hot, exterior hot to touch: Blocked vent or failed cycling thermostat; stop using until fixed.
- Burning smell, lint around baseboards or behind dryer: Severe lint accumulation—disconnect power/gas and clean thoroughly.
Tools That Make Diagnosis Easier

- 4-in. rigid duct sections and elbows (crimped as needed)
- High-quality exterior cap with low resistance, no screen
- Duct brush kit & shop vacuum
- Foil tape and proper band clamps (no sheet-metal screws protruding into airflow)
- Multimeter (continuity/ohms)
- Basic anemometer or airflow vane (optional but helpful)
- Flashlight, inspection mirror, and gloves
When to Pause and Get Guidance
- Condo or strata rules complicate vent work or access to a shared riser.
- Gas dryer with ambiguous ignition behavior.
- Evidence of overheating (scorched lint, repeatedly tripping thermal fuse).
- You’re planning to reroute ducting and want a code-aligned design.
Remember, Appliance Rescue specializes in expert guides, appliance tips, and troubleshooting advice—not dispatching technicians. If you want a second opinion on your plan or need a checklist you can follow, send a note via Contact us.
A Simple, Code-Aware Vent Rebuild Recipe

- Map the shortest feasible path to an exterior wall (avoid roof exits in snowy regions if possible).
- Use rigid 4-in. metal duct with smooth interiors. Minimize elbows; use long sweeps where possible.
- Keep the dryer connector short and gently curved (semi-rigid or rigid per space & manual).
- Seal joints with foil tape; avoid screws protruding into the airflow (they snag lint).
- Install a low-resistance exterior hood with a damper, no screen.
- Verify equivalent length is within the appliance spec (add elbow penalties per the manual).
- Test on High Heat: strong, steady exhaust and a normal 40–60 minute dry time on a typical load.
Bottom Line

In most “dryer runs forever” cases, venting is the villain, and the fix is mechanical, not electronic. Start outside at the hood, work back to the lint screen, then open the duct if needed. Only after airflow is restored should you suspect elements, sensors, or thermostats. Keep changes aligned with NBCC-style expectations: rigid duct, short runs, no screens, proper termination to outdoors. Your reward is faster dry times, lower bills, and a safer laundry room.