

Dryer Not Drying? Check the Lint Screen and Airflow
Dryers are simple in theory—warm air goes in, moist air goes out, clothes get dry. In real life, persistent damp loads, scorching hot cabinets, and mystery shutdowns often trace back to one culprit: poor airflow. Most homeowners empty the lint screen and assume they’re covered. Unfortunately, lint screens can give a false sense of security. They catch a lot, but not everything, and airflow problems usually originate beyond that mesh—inside ducts, exterior hoods, and tight bends you can’t see.
This guide explains how dryer airflow really works, why lint screens sometimes mislead, and the exact steps to diagnose (and prevent) blockages in the venting path. You’ll also find a simple toolbox, safety notes for electric and gas dryers, and a quick checklist you can keep near the laundry area. For more how-to articles and troubleshooting tips, visit Appliance Rescue—an information resource that publishes expert guides; it does not provide repair services.
How a Dryer Actually Moves Air
Think of your dryer as a loop with two jobs: heat and airflow.
- Intake: Room air is drawn into the dryer by a blower wheel.
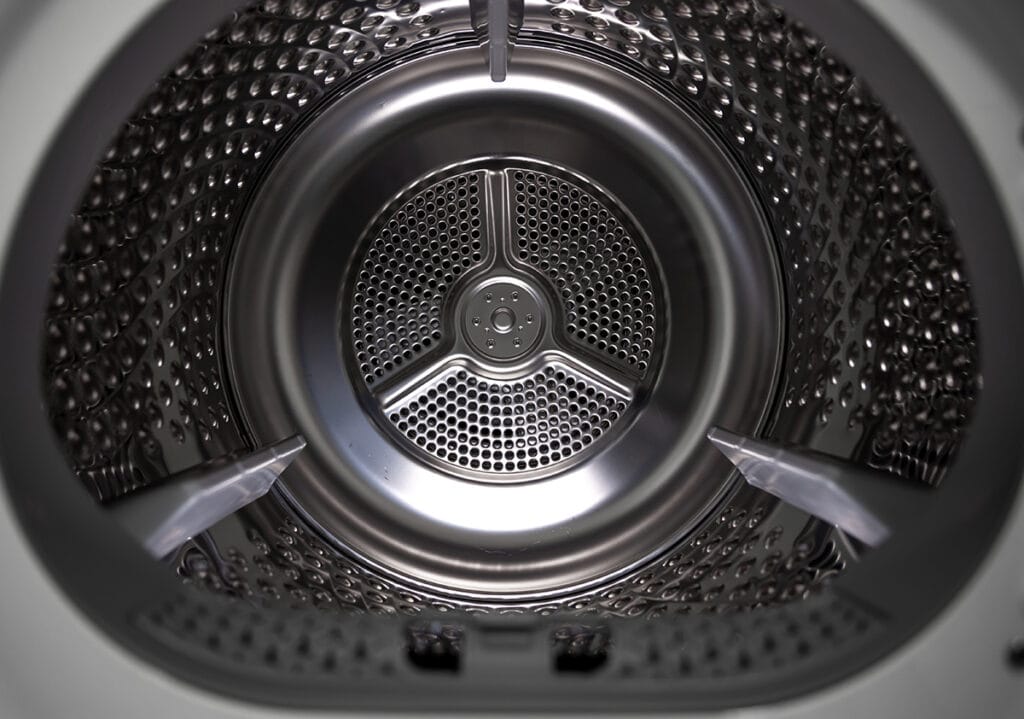
- Heat & tumble: Air passes the heating element (or gas burner), flows through the drum, and picks up moisture from the fabric.
- Exhaust: Moist air moves through the lint screen, into the blower housing, then through the vent duct, and finally exits the home at the exterior hood.
If any segment of this path is constricted, the dryer can overheat, moisture removal slows, and cycles stretch. Modern dryers may try to compensate, but physics wins—restricted airflow means damp clothes and higher utility bills.
Why the Lint Screen Isn’t the Whole Story
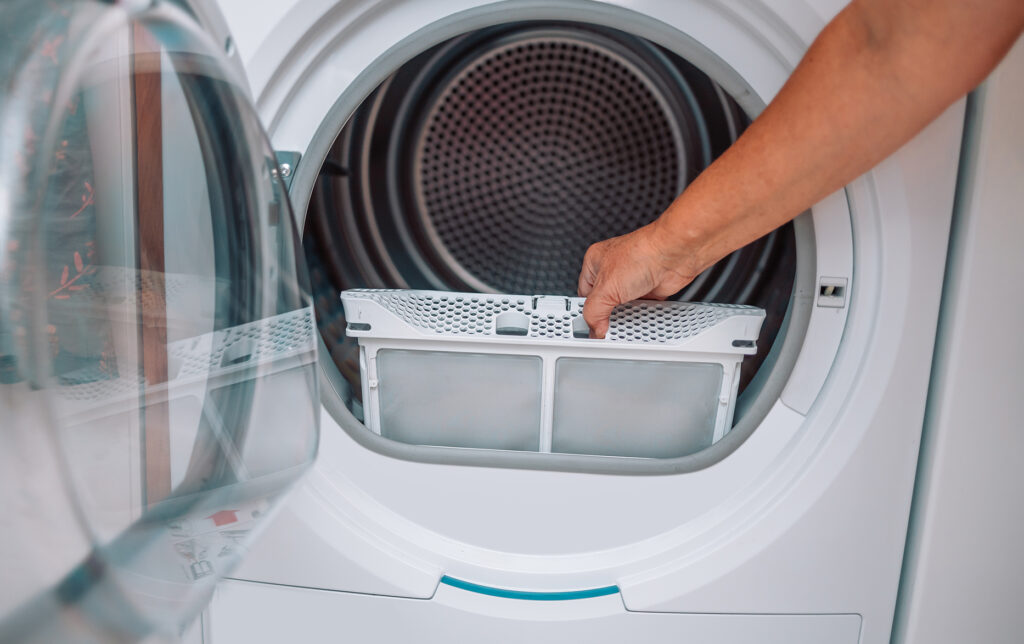
Your lint screen is a first filter, not a final one. Three common traps:
- Residue coating: Dryer sheets and some fabric softeners leave a waxy film on lint screens. Air still passes, but less efficiently. Try a “water bead test”: remove the screen and run a little water over it at the sink. If water beads instead of flowing through, wash the screen gently with warm water and a drop of dish soap, dry fully, and reinstall.
- Bypass lint: Fine lint can slip past the screen and accumulate in the blower housing or duct.
- False confidence: A clean screen can’t reveal a crushed transition hose, a clogged wall run, or a stuck exterior flap.
Quick Health Check: Is Airflow the Problem?
Before you reach for tools, try these low-tech indicators:
- Time-to-dry drift: If your usual load now takes 20–40 minutes longer, airflow is suspect.
- Hot cabinet, cool clothes: The dryer’s body feels very warm, yet garments remain damp.
- Burnt-lint odor: A faint scorched smell hints that lint is lingering near heat sources.
- Weak outdoor exhaust: During a cycle, go outside. The vent hood should blow a steady, warm stream. A lazy puff—or a flap that barely opens—signals restriction.
- Frequent auto-stop or error: Some dryers halt or throw codes when temperature or moisture readings look wrong; restricted airflow can fool these sensors.
The Real Culprits Beyond the Lint Trap

1) Clogged or partially clogged vent duct
Lint settles in low spots and elbows. Every elbow equals friction; long runs magnify the problem.
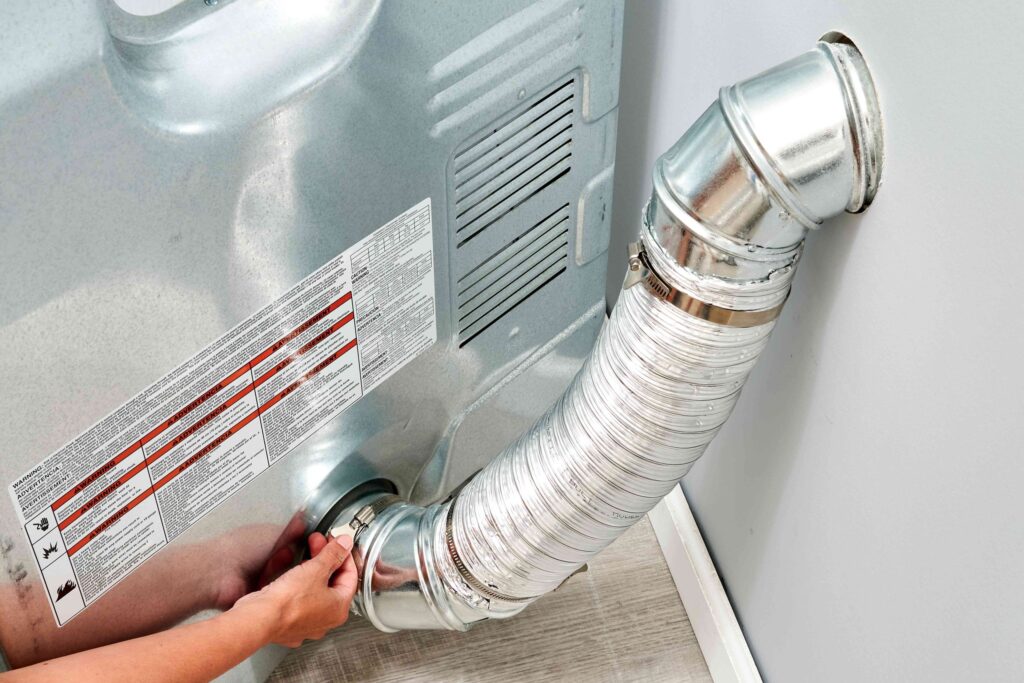
2) Kinked or crushed transition hose
Thin, foil-flex hoses crumple easily when the dryer is pushed back. A gentle “S” curve is fine; a tight “C” is not. Whenever possible, use a short, semi-rigid aluminum connector instead of flimsy foil.
3) Exterior vent hood issues
Flappers stick, screens clog with lint, and birds love cozy vents. If the hood has a fine mesh screen, it will eventually mate with lint—swap to a louvered hood designed for dryers (no bug screen).
4) Excessive length and elbows (static pressure)
The longer and twistier the duct, the harder the blower must work. Many building codes specify maximum equivalent lengths (each elbow “adds” distance). Long runs may require a dryer booster fan—but only after you’ve eliminated simpler issues.
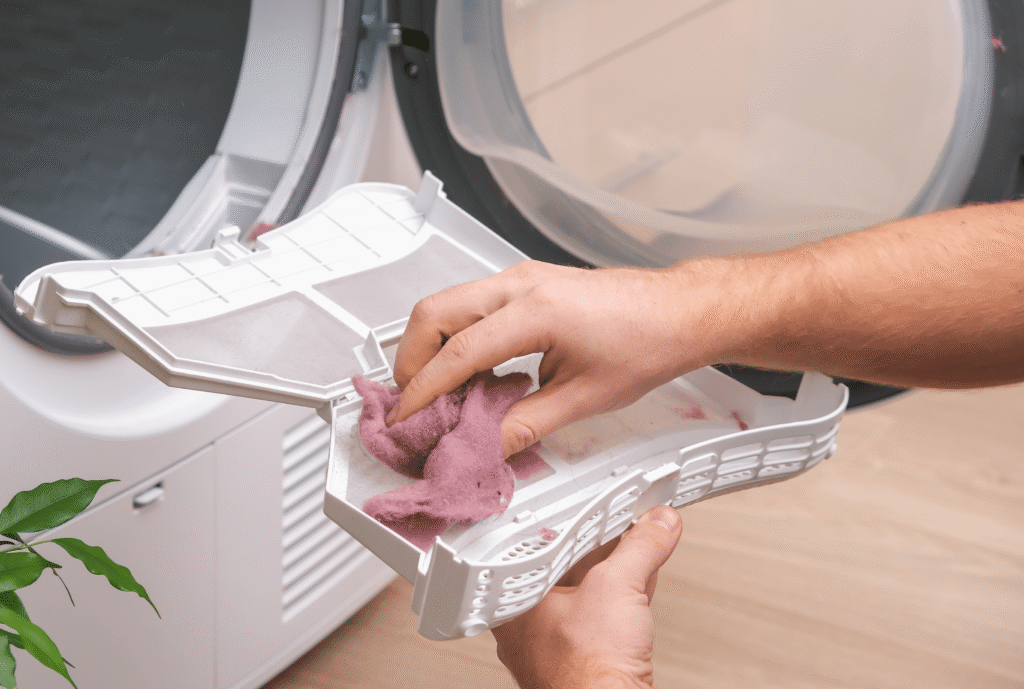
5) Lint in the blower housing
If lint sneaks past the screen and collects around the blower wheel, airflow drops even if the duct is clean.
6) Moisture sensor confusion
Restricted airflow leaves steam inside the drum; auto-dry cycles may misread moisture and run endlessly or stop too soon.
7) (Gas dryers) Combustion safety
A blocked exhaust can affect combustion and raise the risk of carbon monoxide entering the home. If you suspect this, stop using the dryer until ventilation is restored.
A Step-by-Step Diagnostic You Can Do Today
Safety first: Unplug electric dryers. For gas, close the gas valve and unplug. If anything smells like gas or you suspect CO, stop and call local professionals. (Remember: Appliance Rescue offers guides and tips, not in-home service.)
Step 1 — Clean and test the lint screen
- Remove the screen, wash gently with warm water and dish soap, and dry thoroughly.
- Perform the water bead test; ensure water flows through quickly.
Step 2 — Inspect the transition hose
- Pull the dryer forward carefully.
- Replace damaged or crushed foil with semi-rigid aluminum. Keep it as short and straight as possible.
- Re-position the dryer so the hose doesn’t kink when pushed back.
Step 3 — Check airflow at the exterior hood
- Run the dryer on high heat. At the vent, you should feel strong, steady airflow, and the damper should open fully.
- Trash-bag fill test (rough gauge): Hold a clean, light trash bag over the hood (don’t let it get sucked into the duct). It should inflate quickly within seconds. Slow or uneven inflation suggests restriction.
Step 4 — Clean the wall-to-hood run
- Use a rotary vent brush kit from the dryer side, then from the exterior. Move slowly to avoid disconnections.
- Vacuum lint that falls out; avoid sharp turns with the brush rod.
Step 5 — Re-test airflow
- Repeat the exterior hood check. Noticeably stronger flow means you found a blockage.
Step 6 — Inspect the hood itself
- Verify the flap or louvers move freely and open fully during operation.
- Remove any screens (dryer hoods should not have insect screens).
- Check for nests; install a proper louvered cap to discourage animals.
Step 7 — Consider run length & elbows
- If your duct is very long or has several elbows, consult your dryer manual for the maximum equivalent length.
- Where re-routing isn’t feasible, a UL-listed booster fan on long, straight runs can help—but only after the duct is clean and the hood is correct.
Step 8 — Internal lint accumulation (advanced)
- Some lint collects around the blower wheel or inside the cabinet. Access varies by model. If disassembly exceeds your comfort level, seek help from a qualified local technician. Again, Appliance Rescue provides guides and troubleshooting—not repair services.
Tools That Make Diagnosis Easier
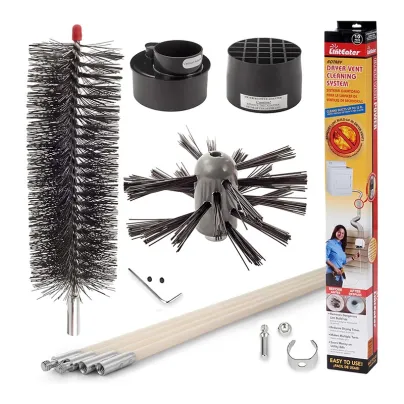
- Flashlight & mirror for behind-dryer visibility
- Vacuum with crevice tool for lint removal
- Rotary vent brush kit (drill-compatible)
- Semi-rigid aluminum transition duct & worm-gear clamps
- Anemometer (optional): quantifies exhaust velocity—useful for long runs
- Painter’s tape & labels to mark duct joints before re-assembly
Prevention: Small Habits, Big Payoff
- Empty the lint screen every load (and wash monthly if you use dryer sheets).
- Quarterly: Inspect the transition hose and clean visible lint.
- Semi-annually: Brush out the vent line and check the exterior hood.
- Use rigid or semi-rigid metal ducting—it stays smooth inside and resists crushing.
- Minimize dryer sheets; consider liquid softener or dryer balls to reduce residue.
- Don’t overload the dryer; airflow depends on the tumbling room.
- Keep the laundry room ventilated; the dryer needs make-up air.
Final Thought
Dryers don’t “wear out” their drying power so much as they lose their breath. When airflow is restored—beyond the lint trap—drying times shrink, energy use drops, and safety improves. Keep the path clear from the drum to daylight, and your dryer will act brand new again.