
Oven Door Not Closing Flush? Fix Hinge and Spring Issues Fast
If your oven door sits slightly ajar, won’t seal evenly, or pops open the last centimeter, you’re not alone. Modern oven doors rely on a surprisingly delicate balance between hinges, springs, hinge receivers, the door gasket, and the latch. When any one of these gets gummed up, bent a hair, or loses tension, the door can stop closing flush. The good news: many of these issues are minor and fixable at home without replacing the door.
This guide walks you through safe diagnostics and simple fixes for common hinge and spring problems—plus a few alignment tricks techs use. It’s designed for homeowners who want practical, low-risk steps first. And a quick note up front: Appliance Rescue does not offer repair services. They publish Expert Guides, Appliance Tips, and Troubleshooting Advice. If you need to reach out with questions about this guide, here’s the Contact us page.
Quick Safety Checklist (Start Here)

- Power off: Switch the oven off at the breaker. For gas ranges, also turn the gas valve to the off position.
- Cool down: Work only when the oven is completely cold.
- Protect the glass: Place a folded towel on the floor or open door to prevent chips or scratches.
- Light & space: Good lighting and a clear workspace reduce accidental strain on hinges.
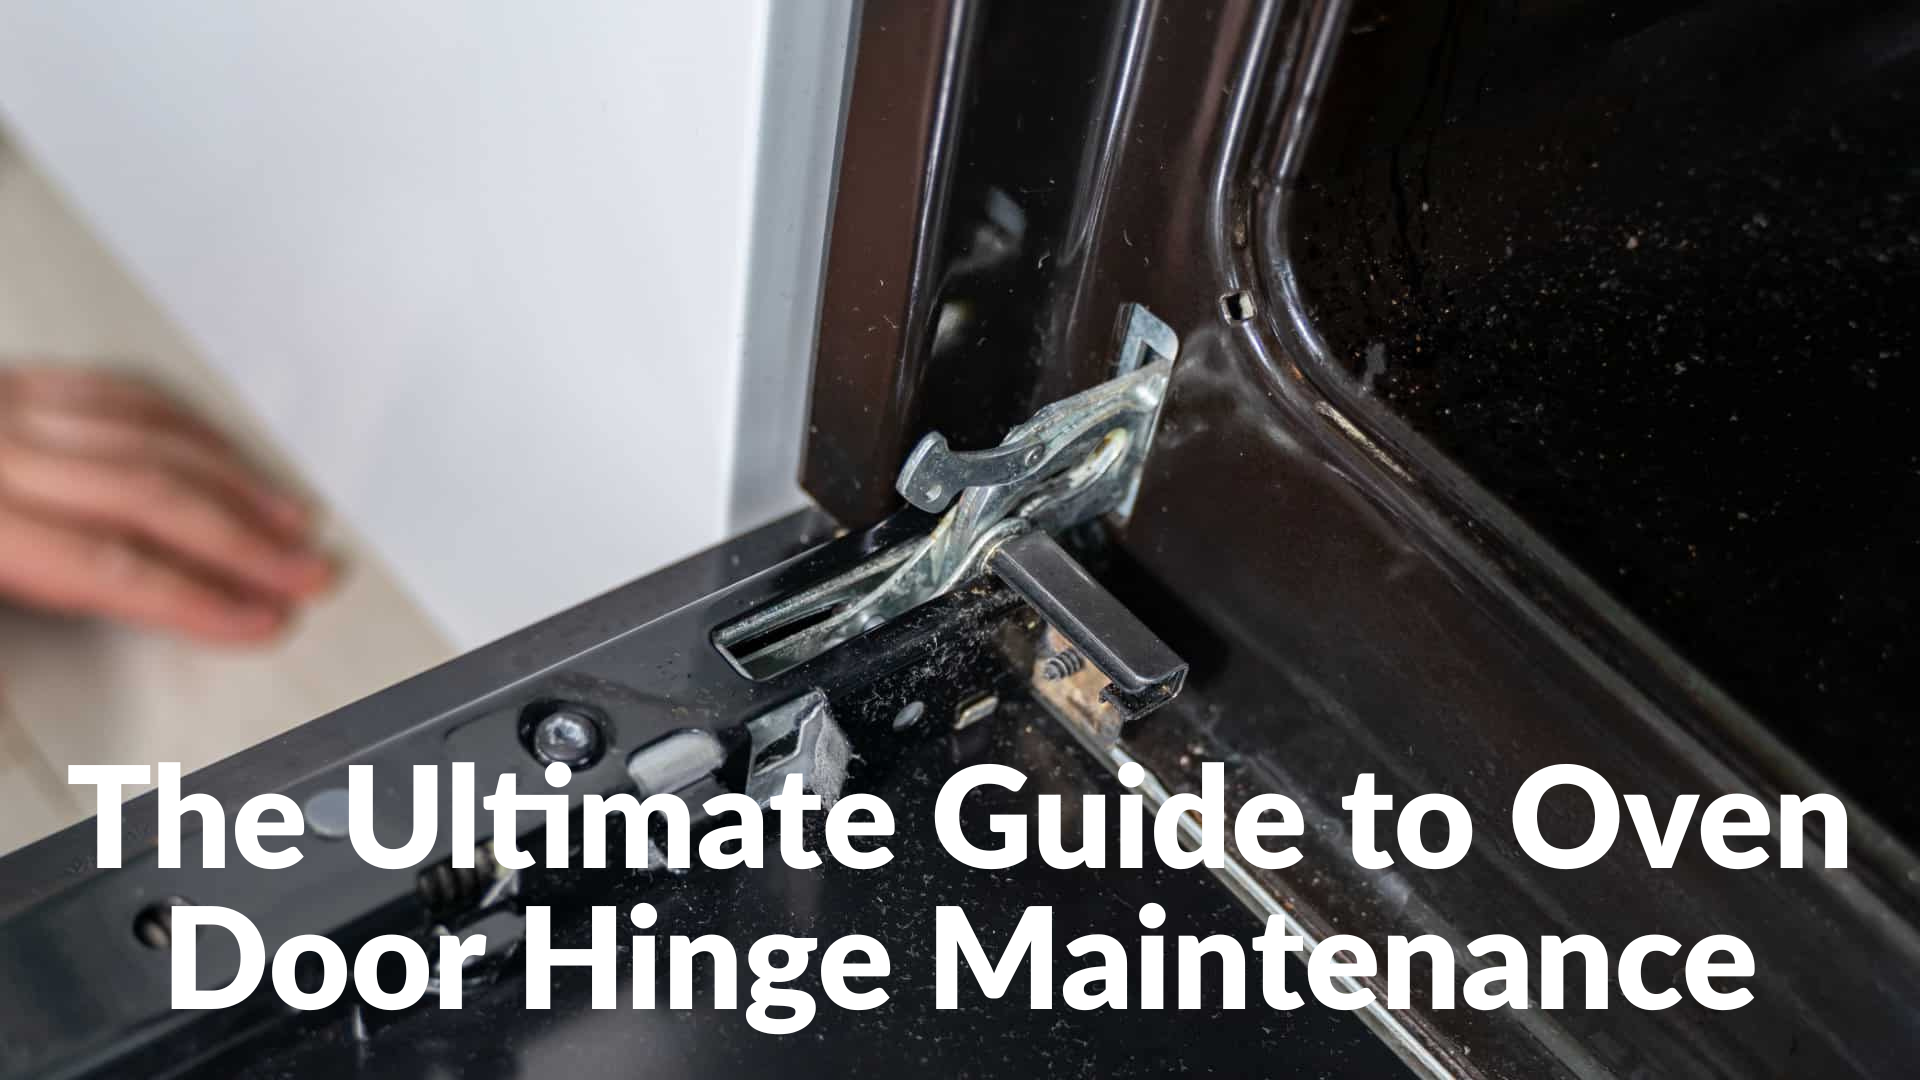
How an Oven Door Actually Stays Shut
- Hinges: Usually a pair of pivoting arms that move in a controlled arc. Small changes in angle or friction make a big difference at the door edge.
- Hinge springs: Provide counter-tension so the door opens smoothly and closes firmly.
- Hinge receivers (on the oven body): Anchors that accept the hinge arms; if they loosen or deform, alignment suffers.
- Latch & strike (on some models): A simple catch that holds the last 1–2 mm closed.
- Door gasket: The rope-like seal around the cavity. If it’s hard, torn, or flattened, the door can feel “bouncy” or never sit flush.
When something’s off, the door may sag on one side, stop shy of the frame, or spring back slightly after you close it.
Symptoms & What They Usually Mean
- Gap at the top center: Tired springs or hinges not retracting fully.
- Gap at one corner: Hinge receiver loosened or hinge arm slightly bent.
- Door pops open the last bit: Sticky hinge pivots or fouled hinge cavity; sometimes a stiff gasket pushing back.
- Door scrapes frame: Misaligned hinges or a door panel that was reinstalled off-track after cleaning.
Tools & Supplies You’ll Want
- #2 Phillips and flat screwdrivers
- Needle-nose pliers
- Flashlight or headlamp
- Non-abrasive cleaner and microfiber cloths
- Cotton swabs or a thin nylon brush
- High-temp, food-safe lubricant (silicone-based is common; check the label for high-temperature tolerance)
- Small adjustable wrench
- Heat-resistant gloves
- Painter’s tape (to mark original positions)
Step-By-Step: Fixes for Minor Hinge & Spring Issues
1) Confirm the Gasket Isn’t the Culprit
Before diving into hinges, run a finger around the gasket. Look for hard spots, tears, or flattened areas. If it’s filthy, clean it with mild soap and water, then let it fully dry. A hardened gasket can push the door outward; cleaning sometimes restores enough compliance to close flush again.
Tip: If a small section is especially flat, rotate the gasket (if your model allows) so the less-compressed section sits at the top.
2) Inspect the Hinge Arms (Door Removed Method)
Most oven doors can be lifted off their hinges for easier access.
- Open to the “service position”: Many doors have hinge locks—flip the small metal tab on each hinge toward the door.
- Lift off: Close the door halfway and lift straight up. Store it face-up on a towel.
- Check for play: Wiggle each hinge arm gently. Excess side-to-side play suggests wear or a loose receiver.
- Clean: Degrease grime on the arms and around the pivot points with a cloth and cotton swabs.
Do not bend hinges by hand; you’ll often make alignment worse. If you suspect a bend, focus on cleaning and reseating first.
3) Clean and Lubricate Hinge Pivots (Lightly)
Friction is a common reason a door won’t pull fully shut.
- Apply a very small amount of high-temp, food-safe lubricant at the pivot—not on broad metal surfaces.
- Open and close the hinge arm several times (with the door still off) to work the lubricant in.
- Wipe any excess; you do not want drips near the oven cavity.
Note: Avoid petroleum greases that can smoke. Always verify the lubricant’s temperature rating.
4) Reseat the Door Properly
Improper reinstallation can leave a 1–3 mm gap.
- Align each hinge arm with its receiver slot.
- Slide the door fully onto the receivers until it bottoms out.
- Open the door completely and flip the hinge locks back to their original position.
- Test for a flush close.
If the gap is gone: great. If not, continue.
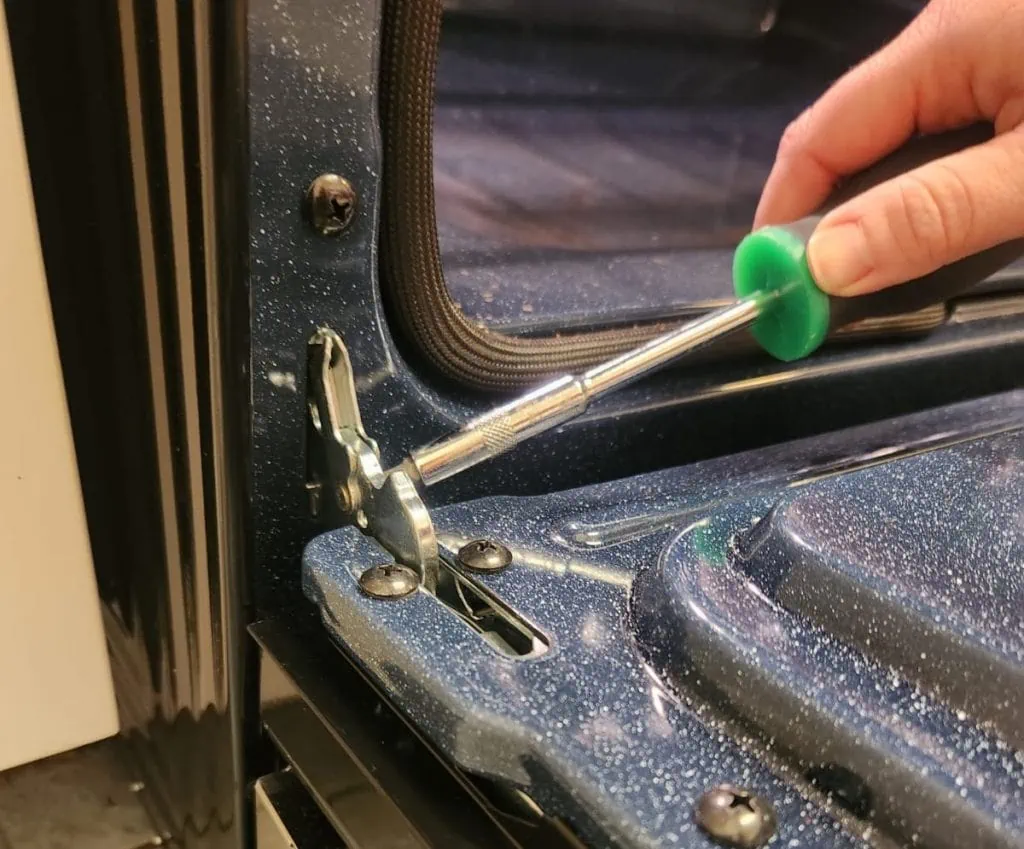
5) Tighten the Hinge Receivers
A slightly loose receiver will allow the hinge to sit crooked.
- With the door off, look at the receiver screws on the oven frame.
- Mark current positions with painter’s tape.
- Snug loose screws (don’t over-torque; you can strip thin sheet metal).
- If a receiver plate is skewed, loosen just enough to align, then retighten.
6) Check Spring Tension (External vs. Internal)
On some freestanding ranges, hinge springs are visible with the lower drawer removed; on many wall ovens, springs are enclosed.
- Visible springs: Look for obvious stretch, corrosion, or a spring that’s slipped from its anchor hole. Using needle-nose pliers, reseat a slipped spring in its original hole. If there are multiple anchor holes, moving to a slightly tighter hole can restore closing force—but only one step.
- Enclosed hinges: You won’t adjust internal springs, but you can still benefit from cleaning and lubrication of the hinge pivot and verifying the hinge seats correctly.
Caution: Springs store energy. Wear gloves and keep fingers out of pinch points.
7) Micro-Alignment Trick (Shim the Receiver—If Needed)
If one corner still stands proud, a thin shim behind the receiver can square things up.
- Loosen the receiver’s mounting screws on the high side.
- Slip a very thin metal shim (or trimmed aluminum can tab) behind the plate.
- Retighten and test. This is reversible and often enough to correct a 1–2 mm mismatch.
8) Assess the Latch (If Your Model Uses One)
Not all ovens use a latch for normal operation, but if yours does:
- Clean the strike plate and latch tongue.
- Slightly loosen the strike, nudge it in or out by a millimeter, and retighten.
- You want a firm close without needing to slam.
Common Mistakes to Avoid

- Lubing everything: Over-lubrication attracts grease and dust, making hinges stickier over time.
- Bending hinge arms: This usually worsens geometry and can crack the hinge.
- Forgetting hinge locks: Failing to set or reset them can prevent the door from seating fully.
- Leveling ignored: A badly unlevel range can make a door look misaligned; check the appliance’s front-to-back and side-to-side level with a small bubble level.
When Minor Fixes Aren’t Enough
There are limits to DIY. If hinges are visibly cracked, receivers are torn, glass is loose, or springs are severely stretched, part replacement is safer than continued adjustment. Remember, Appliance Rescue provides guides and troubleshooting advice, not repair services. For model-specific parts or complex issues, consult your manufacturer’s service manual or a licensed technician. If you want to ask a question about the steps above, use the Contact us form.
Preventive Care to Keep the Door Closing Flush

- Wipe spills promptly: Sugary or acidic spills near the hinges harden and cause stickiness.
- Gentle open/close: Avoid resting heavy trays on the open door; it stresses hinges and springs.
- Annual hinge cavity clean: Door off, quick dust and degrease around receivers.
- Inspect the gasket yearly: If it’s brittle or popping out of its channel, address it early.
Final Notes
A door that won’t close flush is often the sum of tiny problems: a dusty pivot, a lazy spring hole, a loose receiver screw. Address them in the order above and you’ll usually reclaim that snug, factory-like close—without replacing the entire door. And when in doubt about scope or safety, lean on official documentation and qualified technicians. For more tutorials and diagnostic checklists, browse Appliance Rescue, and if you have a question about this guide specifically, the Contact us page is open.